Retouch Menu- Every Setting On Your DSLR Explained (Part Seven)


Understanding all your camera’s capabilities is a huge advantage when trying to create great photos. DSLRs have a huge variety of settings and features, most of which people either don’t understand, or just simply ignore. This is a comprehensive guide to every single one of your cameras settings, where they are, and what they do. I will go through what every button does, and what all the menu settings do, and I will be using a Nikon D600 for this tutorial. Every camera is different, so therefore your camera may differ slightly, but the majority of the settings are universal across most camera brands, you just may find that some buttons or settings may be in different places. There’s a huge amount of information, therefore I will be splitting this post into multiple parts. Here in part seven, we shall go through the in-camera ‘Retouch’ menu.
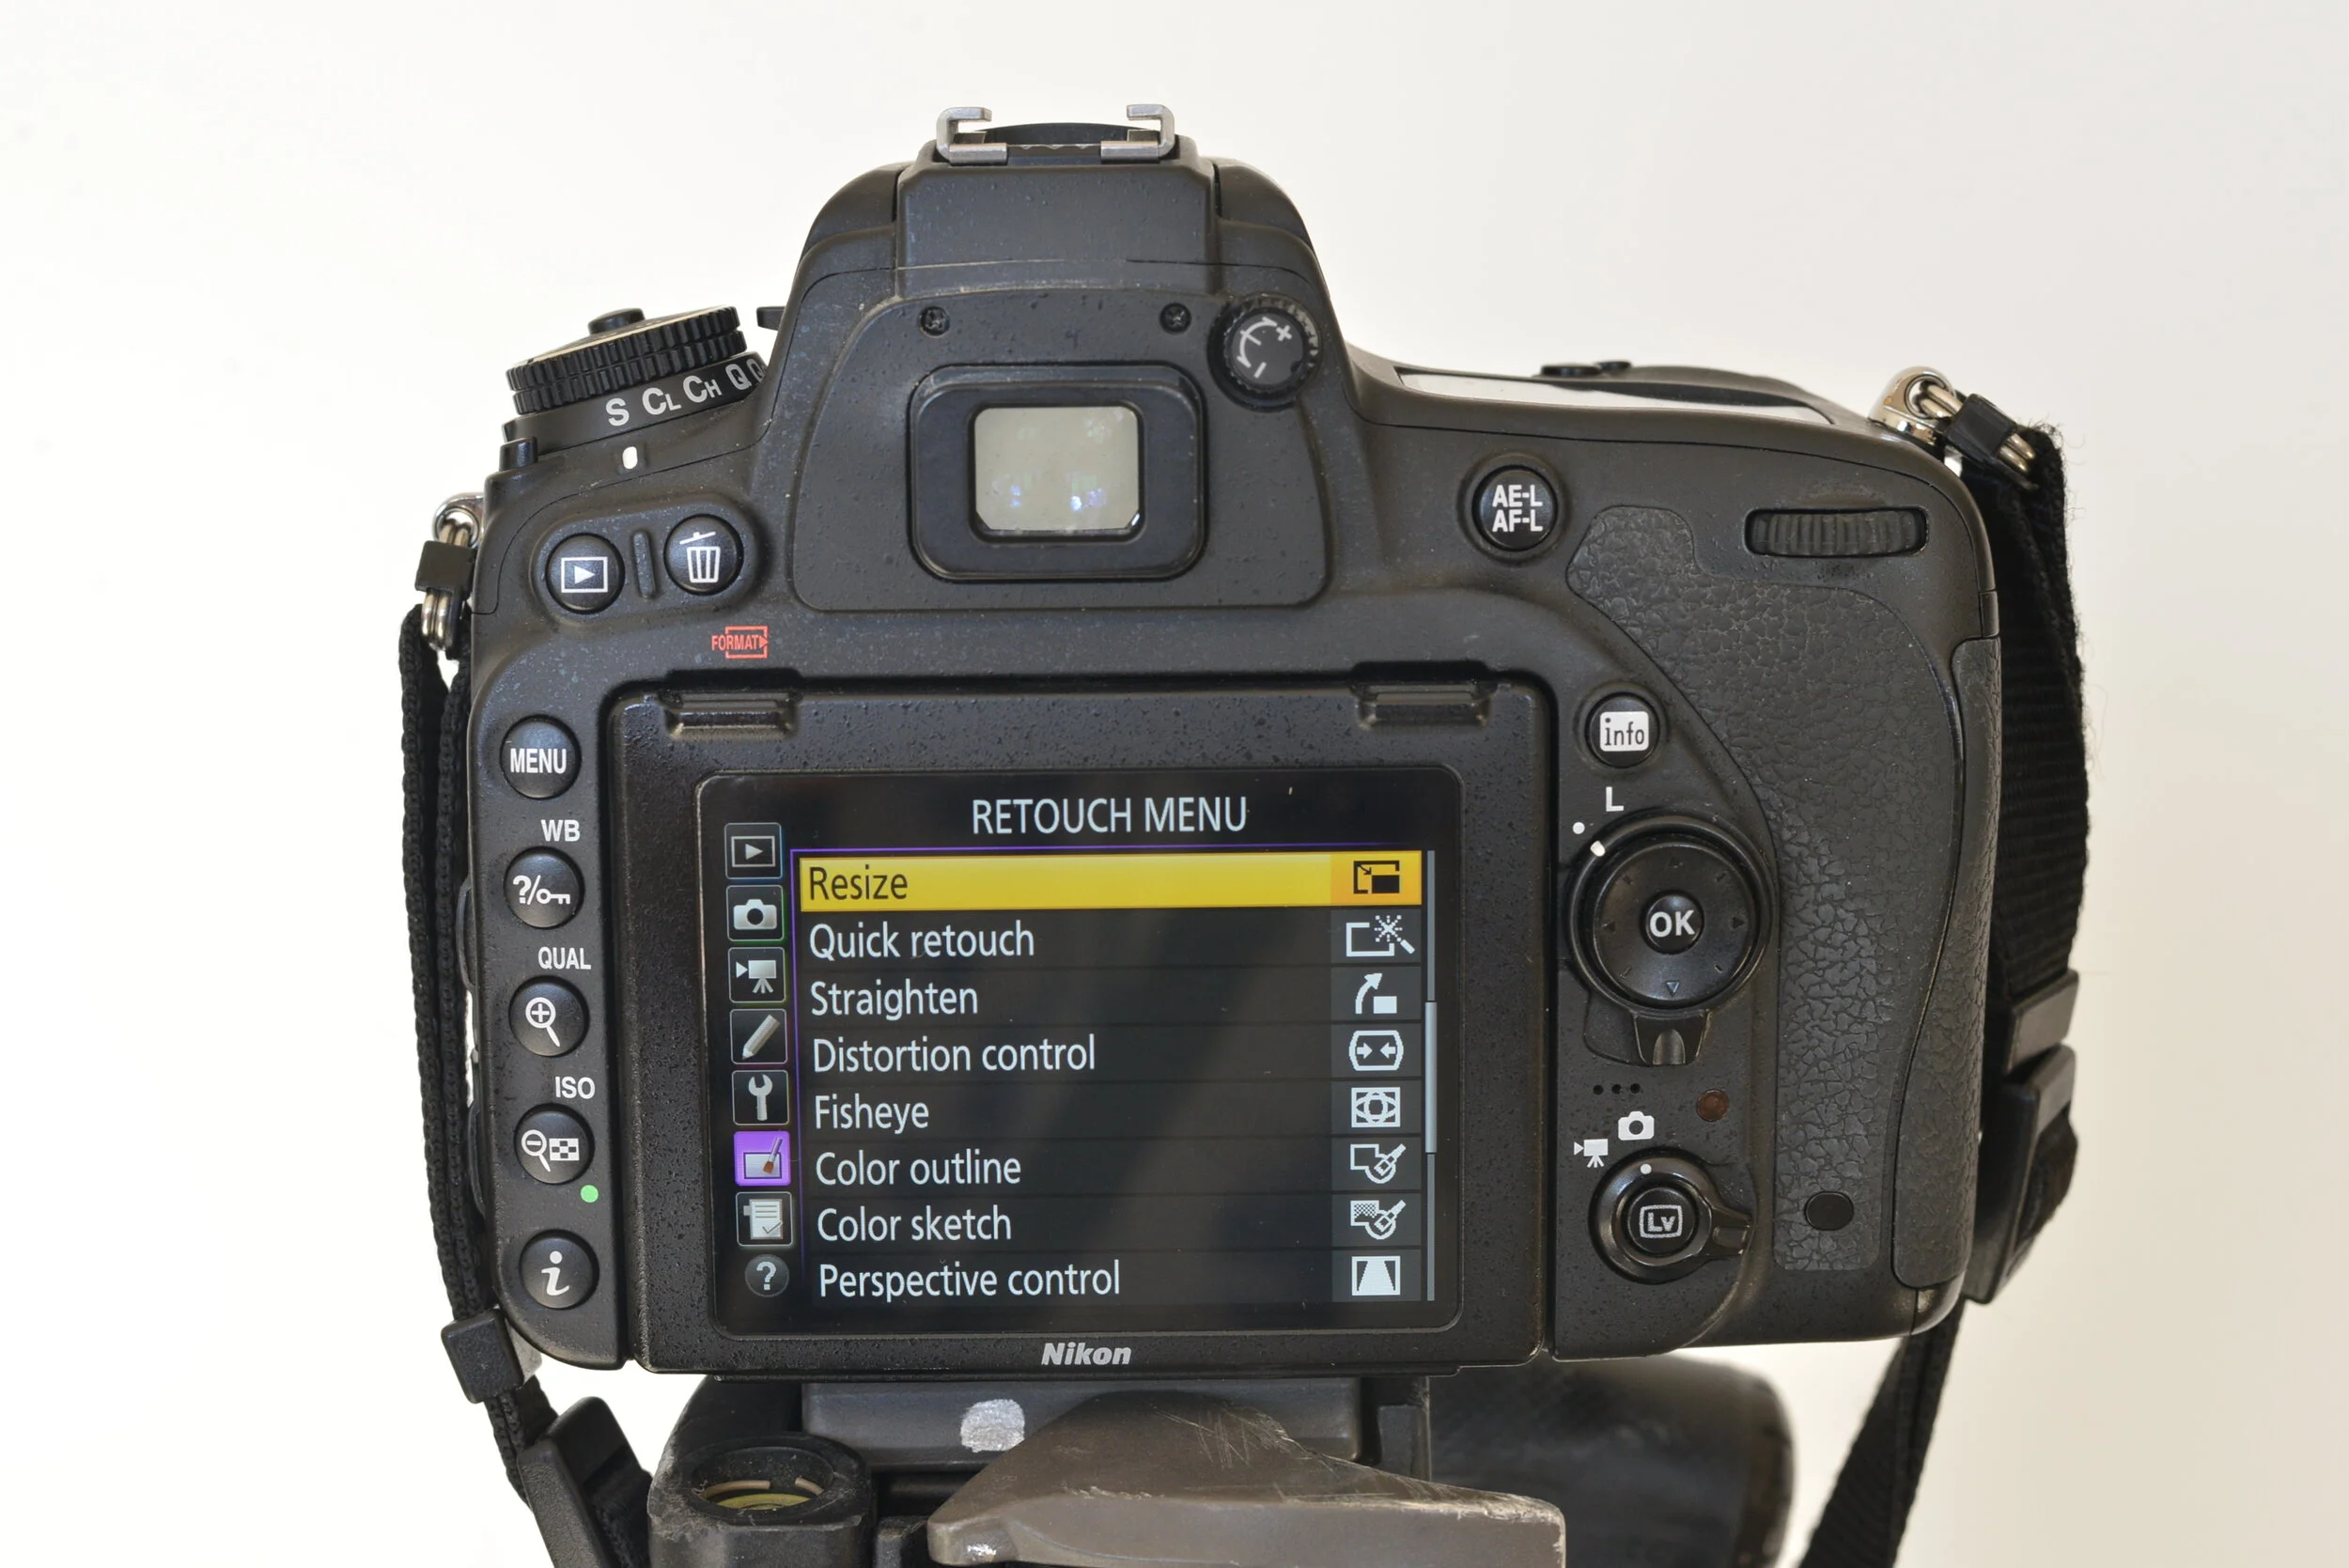
Retouch Menu
The Retouch menu allows you to carry out a range of post-processing options to any images taken and stored on your current memory card in-camera.
D-Lighting
D-Lighting brightens shadows, making it ideal for dark and high contrast photographs. You can also shoot photos with D-Lighting enabled in the Photo Shooting Menu.


Red-Eye Correction
This option is used to correct “red-eye” caused by the flash, and is therefore only available with photographs taken using the flash.


Trim
This is where you can create a cropped copy of any selected photograph. The photograph will be displayed with the selected crop shown in yellow.


Monochrome
You can create a copy of any of your photographs in Black-and-white, Sepia, or Cyanotype (blue and white).


Filter Effects
You can add different effects to your photographs including skylight (makes image less blue), warm (makes the image more orange), red/green/blue intensifier (gives the image a red/green/blue colour cast), cross screen (adds a starburst to light sources) and soft (slightly blurs the photo).


Colour Balance
You can alter the colour balance of any of your photos, therefore creating a colour cast over the image (for example making it more green or more red).


Image Overlay
Image overlay combines two existing RAW photographs to create a single picture that is saved separately from the originals, very similar to the Multiple Exposure setting.


NEF (RAW) Processing
You can use this menu to create JPEG copies of RAW photographs.


Resize
This is where you can create smaller copies of any of your photographs.

Quick Retouch
This where you can create copies of your photographs that have enhanced saturation and contrast. D-Lighting will also be applied (if required) to brighten dark or high contrast images.


Straighten
If one of your images is slightly off-balance, you can rotate the image clockwise/counter-clockwise by up to five degrees in increments of approximately 0.25 degrees. This will crop out some edges of your photograph in the process.


Distortion Control
This is where you can create copies with reduced peripheral distortion, often caused by certain lenses such as wide-angle lenses. This will crop out some edges of your photograph in the process.


Fish Eye
You can create copies of your photographs that appear to have been taken with a fisheye lens, creating an extreme peripheral distortion.


Colour Outline
You can create an ‘outline’ copy of a photograph which can be used as a base for painting.


Colour Sketch
You can create a copy of a photograph that resembles a sketch made with coloured pencils.


Perspective Control
You can create copies that reduce the effects of perspective taken from the base of a tall object. This will straighten out any bulging edges but may result in some of the image edges being cropped out.


Miniature Effect
You can create a copy that appears to be a photo of a diorama (basically making any real objects look fake or like toys). Works best with photos taken from a high vantage point. The area that will be in focus in the copy is indicated by a yellow frame.


Selective Colour
You can create a copy of a photograph in which only selected hues appear in colour and the rest turns to black and white.


Edit Movie
You can trim down any video footage to create edited copies of movies and you can also save selected frames as JPEG stills too.


Hopefully this was helpful for you and allowed you to understand your camera a bit better. If you want to learn more about in-camera menus, you can read my previous posts about the other in-camera menus. Click here for Part One of ‘Every Setting On Your DSLR Explained’, where I go through all the various buttons and switches on your camera and what they all do. You can also read more about the Retouch menu here in the online Nikon manual.
All images in this post are copyright (c) of Aby-Joanne Photography.