
Setup Menu- Every Setting On Your DSLR Explained (Part Six)


Understanding all your camera’s capabilities is a huge advantage when trying to create great photos. DSLRs have a huge variety of settings and features, most of which people either don’t understand, or just simply ignore. This is a comprehensive guide to every single one of your cameras settings, where they are, and what they do. I will go through what every button does, and what all the menu settings do, and I will be using a Nikon D600 for this tutorial. Every camera is different, so therefore your camera may differ slightly, but the majority of the settings are universal across most camera brands, you just may find that some buttons or settings may be in different places. There’s a huge amount of information, therefore I will be splitting this post into multiple parts. Here in part six, we shall go through the in-camera ‘Setup’ menu.
Setup Menu
The Setup menu goes over all the basic settings in your camera, including how to set up the time, date and language as well as adjust fundamental shooting settings and alter displays.
Format Memory Card
Deleting photos does not permanently delete all the data from a card and some data is always recoverable. To completely wipe your card of any lingering data (which will accumulate over time eventually effecting your storage capacity) simply format your card(s) using this menu.


Save User Settings
If you shoot in the same settings frequently, you can save these settings to either U1 or U2 modes (accessed via the top left control dial).


Reset User Settings
Use this menu to reset any settings saved to U1 and U2 modes.


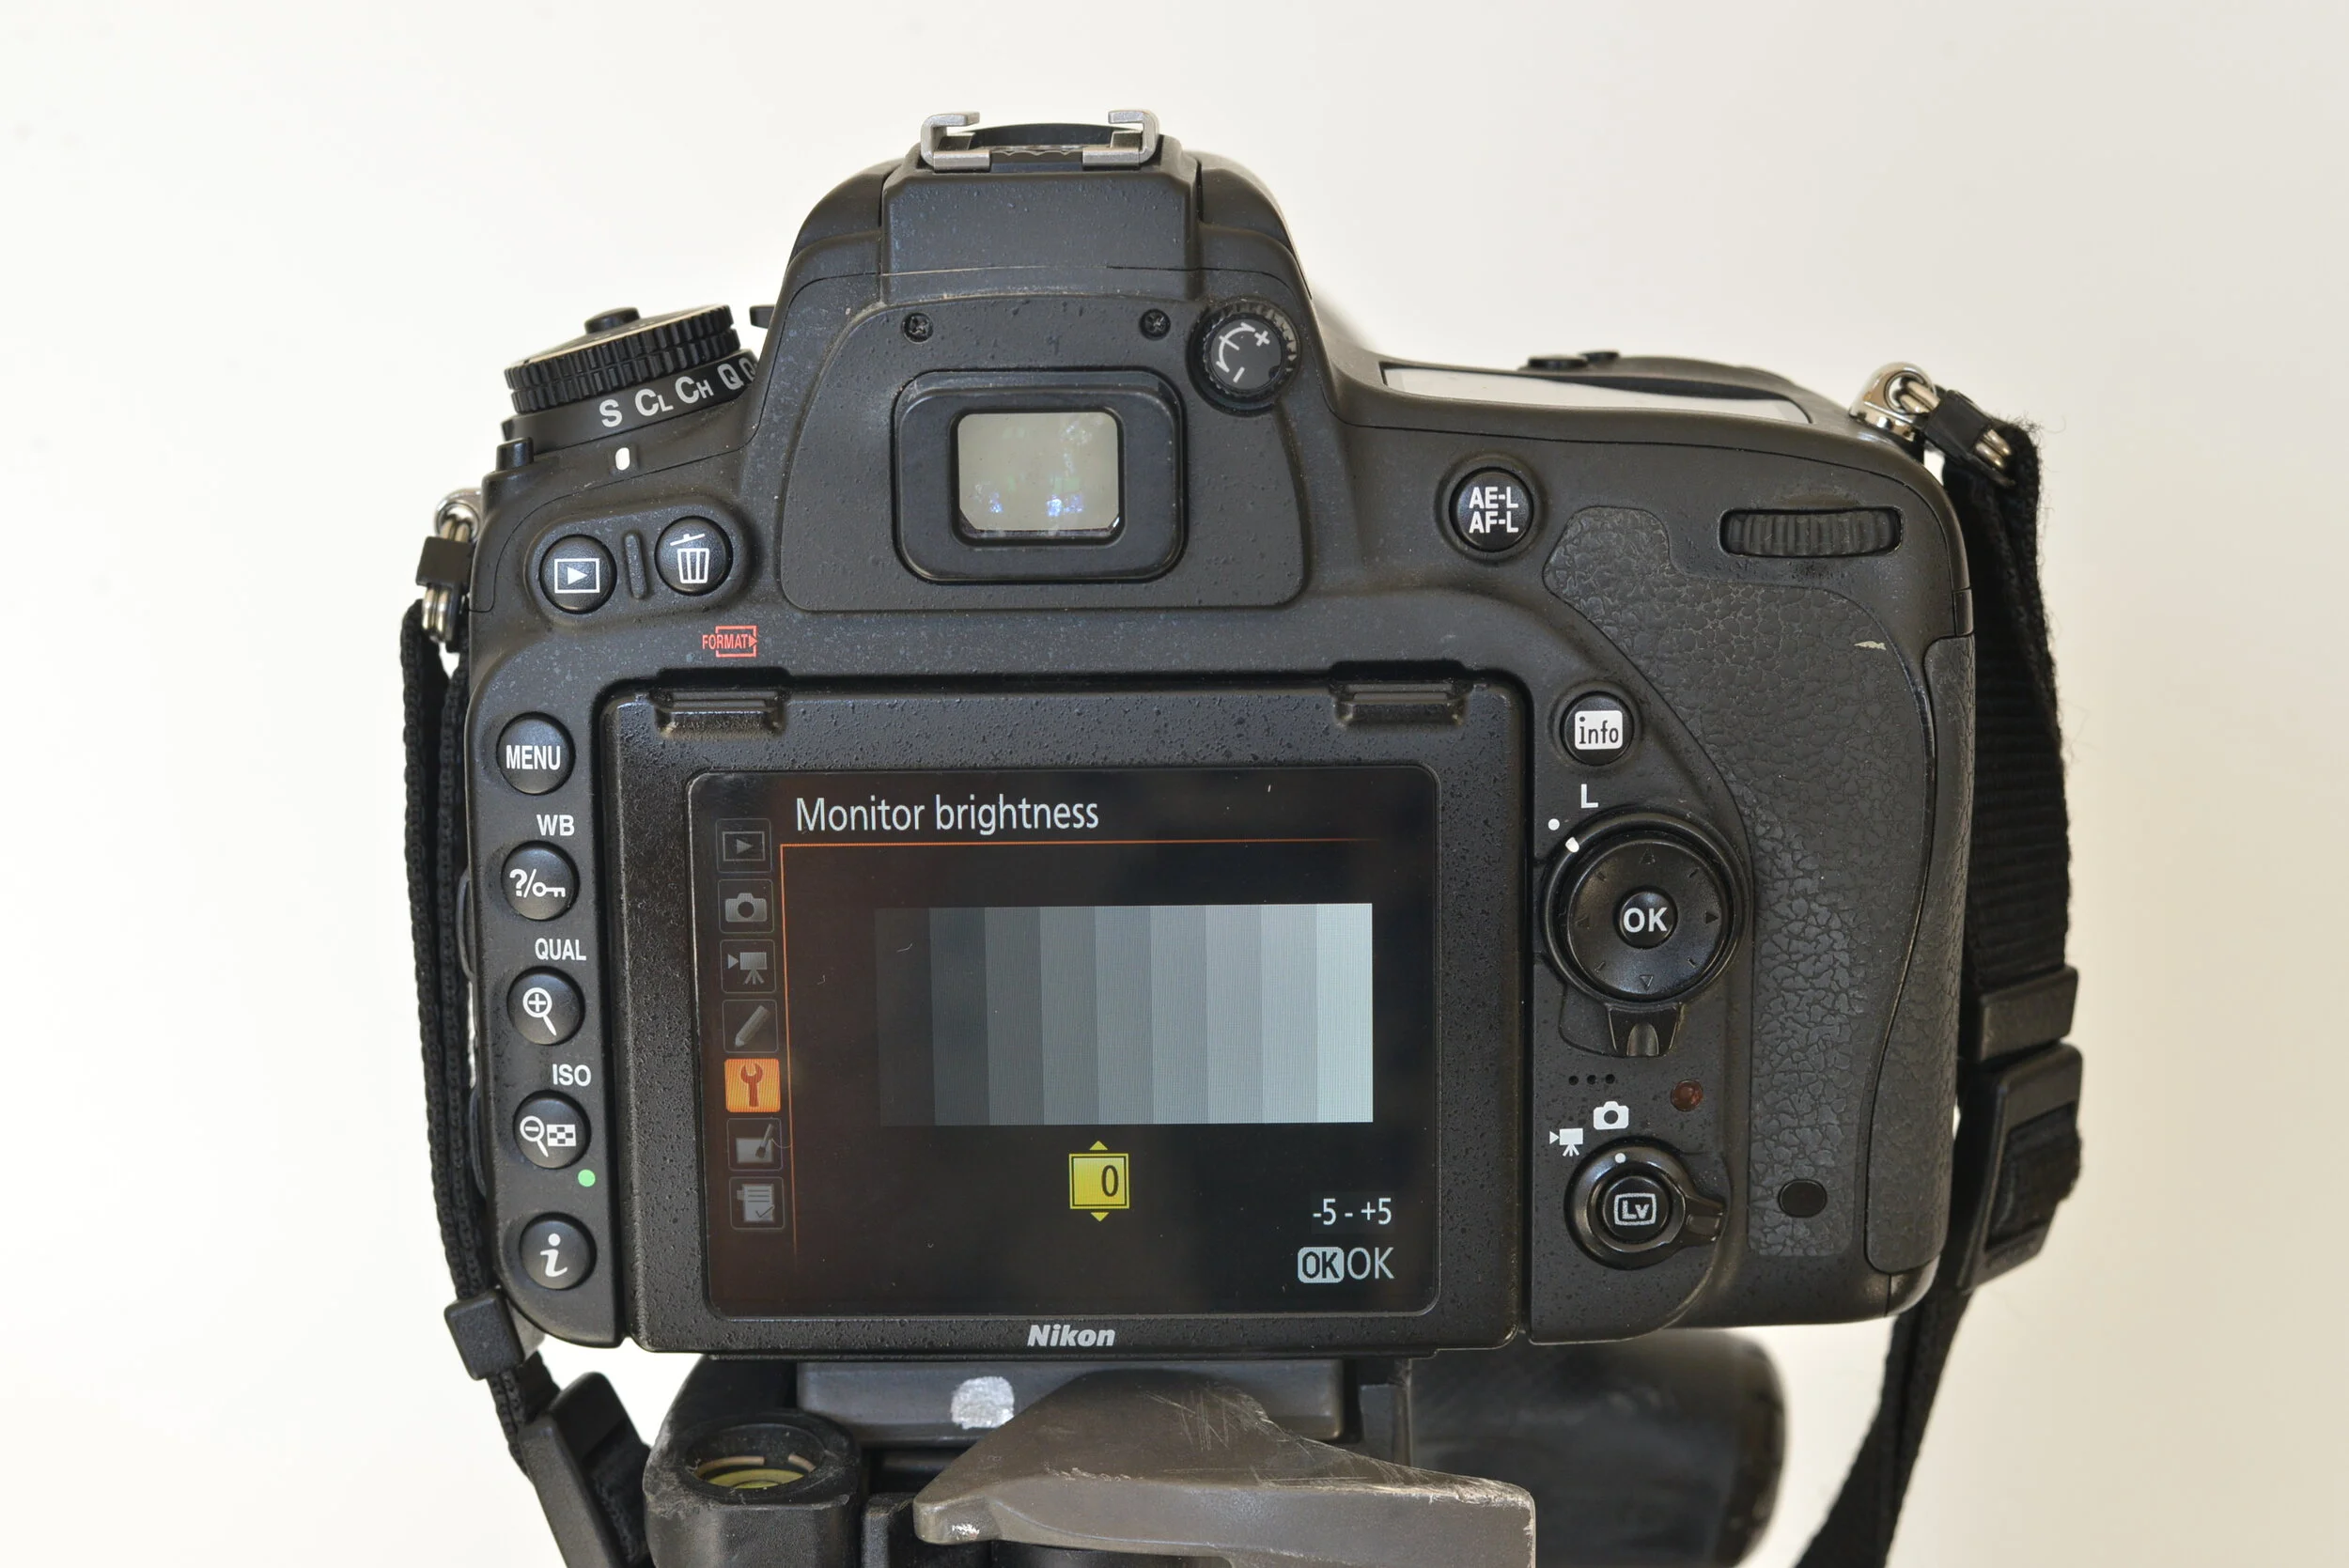
Monitor Brightness
Use this option to make your screen brighter or darker depending on what conditions you are shooting in.

Monitor Colour Balance
You can adjust your monitor’s colour balance with reference to a sample image (typically the last image taken). This will only affect your screen and not the images taken.


Clean Image Sensor
This option vibrates the sensor to remove dust that accumulates on the sensor when lenses are changed frequently.


Lock Mirror Up For Cleaning
Use this option to lock the mirror up so that dust that cannot be removed using ‘Clean image sensor’ can be removed manually. This is not recommended unless you are experienced in cleaning sensors as the sensor can be very easily damaged.


Image Dust Off Ref Photo
This is where you can remove dust from RAW photos and is only available when a CPU/Non-DX lens is mounted on the camera. After pressing ‘start’, manually set your focus to infinity and take a photo of a well-light white surface (a white wall for example). You can then transfer this reference image along with all affected images you want to clean into computer software, such as Capture NX, and the software will layer the images, therefore detecting any matching dust and removing it.


Flicker Reduction
All LED lights produce a flicker which can be captured at very high shutter speeds (for example when using continuous burst mode at a high shutter speed, one photo could show the lights on and the next they would appear off). You can also see this when pointing a camera towards a TV or computer screen when faint lines seem to appear in the photo. Use this menu to help reduce this effect.


Time Zone and Date
Choose your current time zone and date as well as the format it is displayed in and the option for daylight savings time (when the clocks go forward or back).


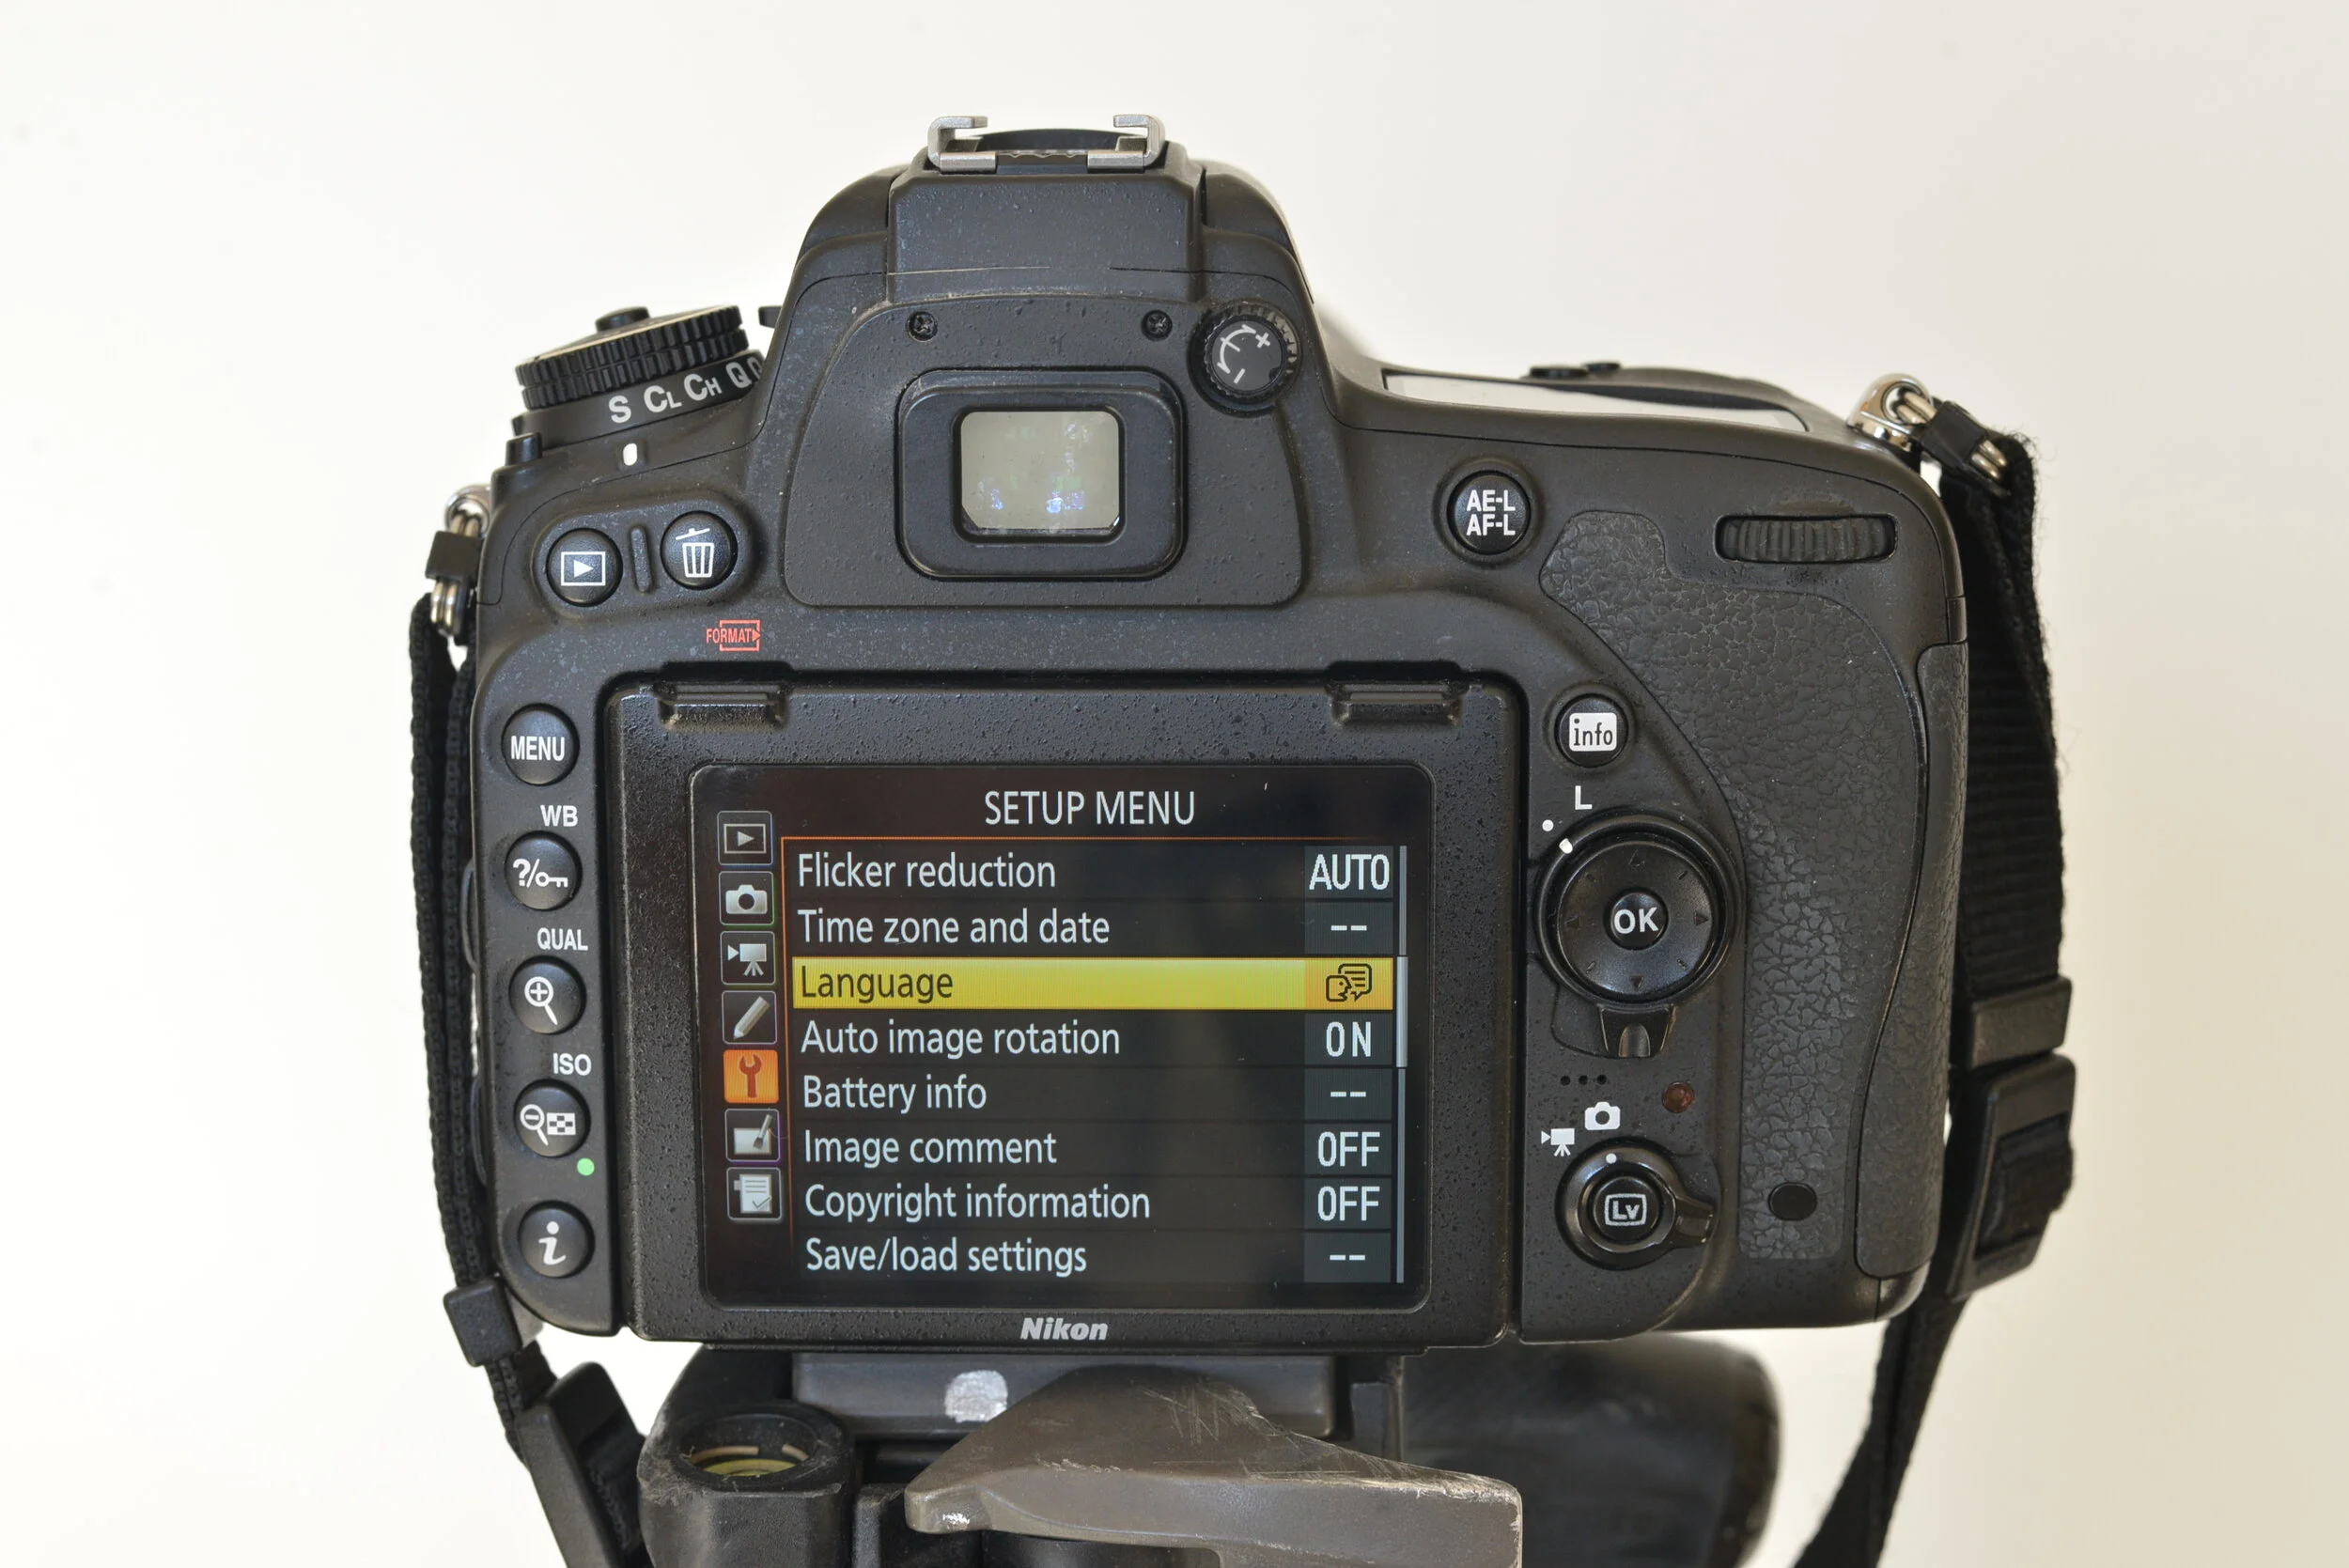
Language
Choose which language you would like to set the camera to.

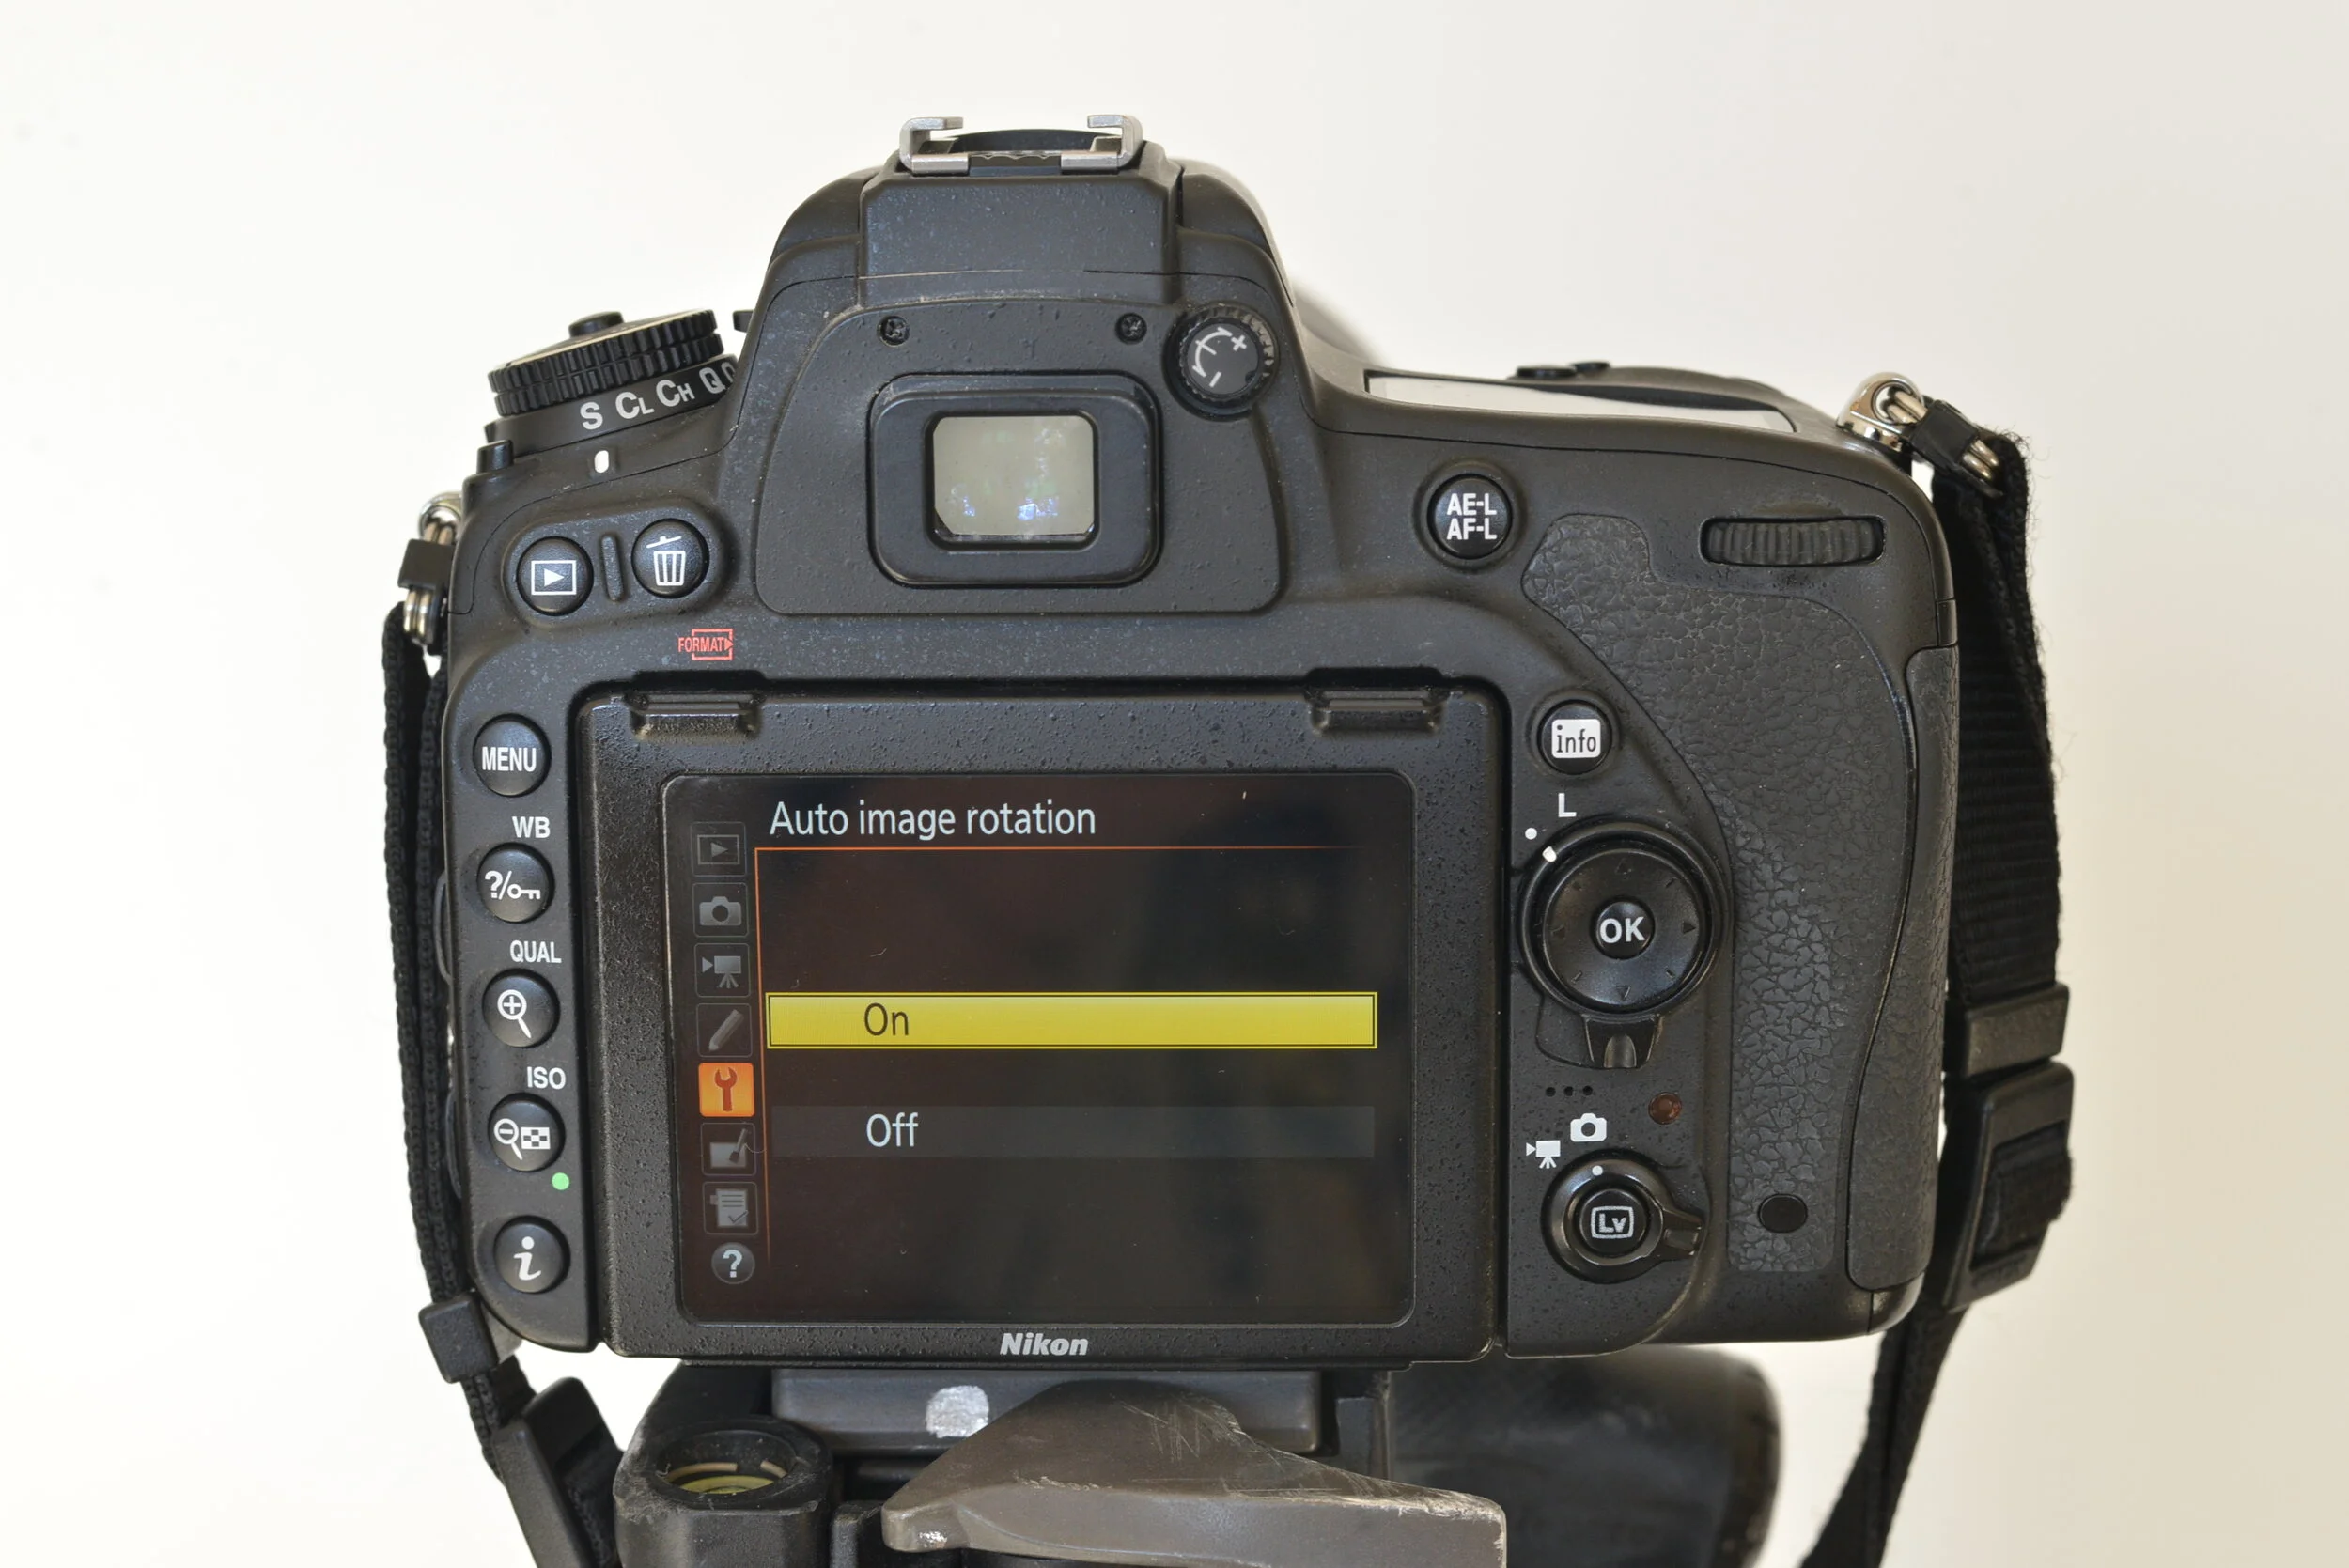
Auto Image Rotation
This will determine whether any portrait photographs show in a portrait orientation during playback or whether they automatically rotate to fit the screen in a landscape orientation.

Battery Info
You can view information on the battery currently inserted in the camera, including the amount of charge remaining, the number of times the shutter has been pressed with the current battery in use, age of the battery (will show 4 if it is nearing the end of it’s optimal charging life) and the battery calibration.


Image Comment
You can add a comment to new photographs as they are taken. This will be included in the shooting data shown in the photo information display and can be viewed as metadata too.


Copyright Information
You can add copyright information to new photographs as they are taken. This will be included in the shooting data shown in the photo information display and can be viewed as metadata too. You can enter the photographer’s name and the copyright holder info.


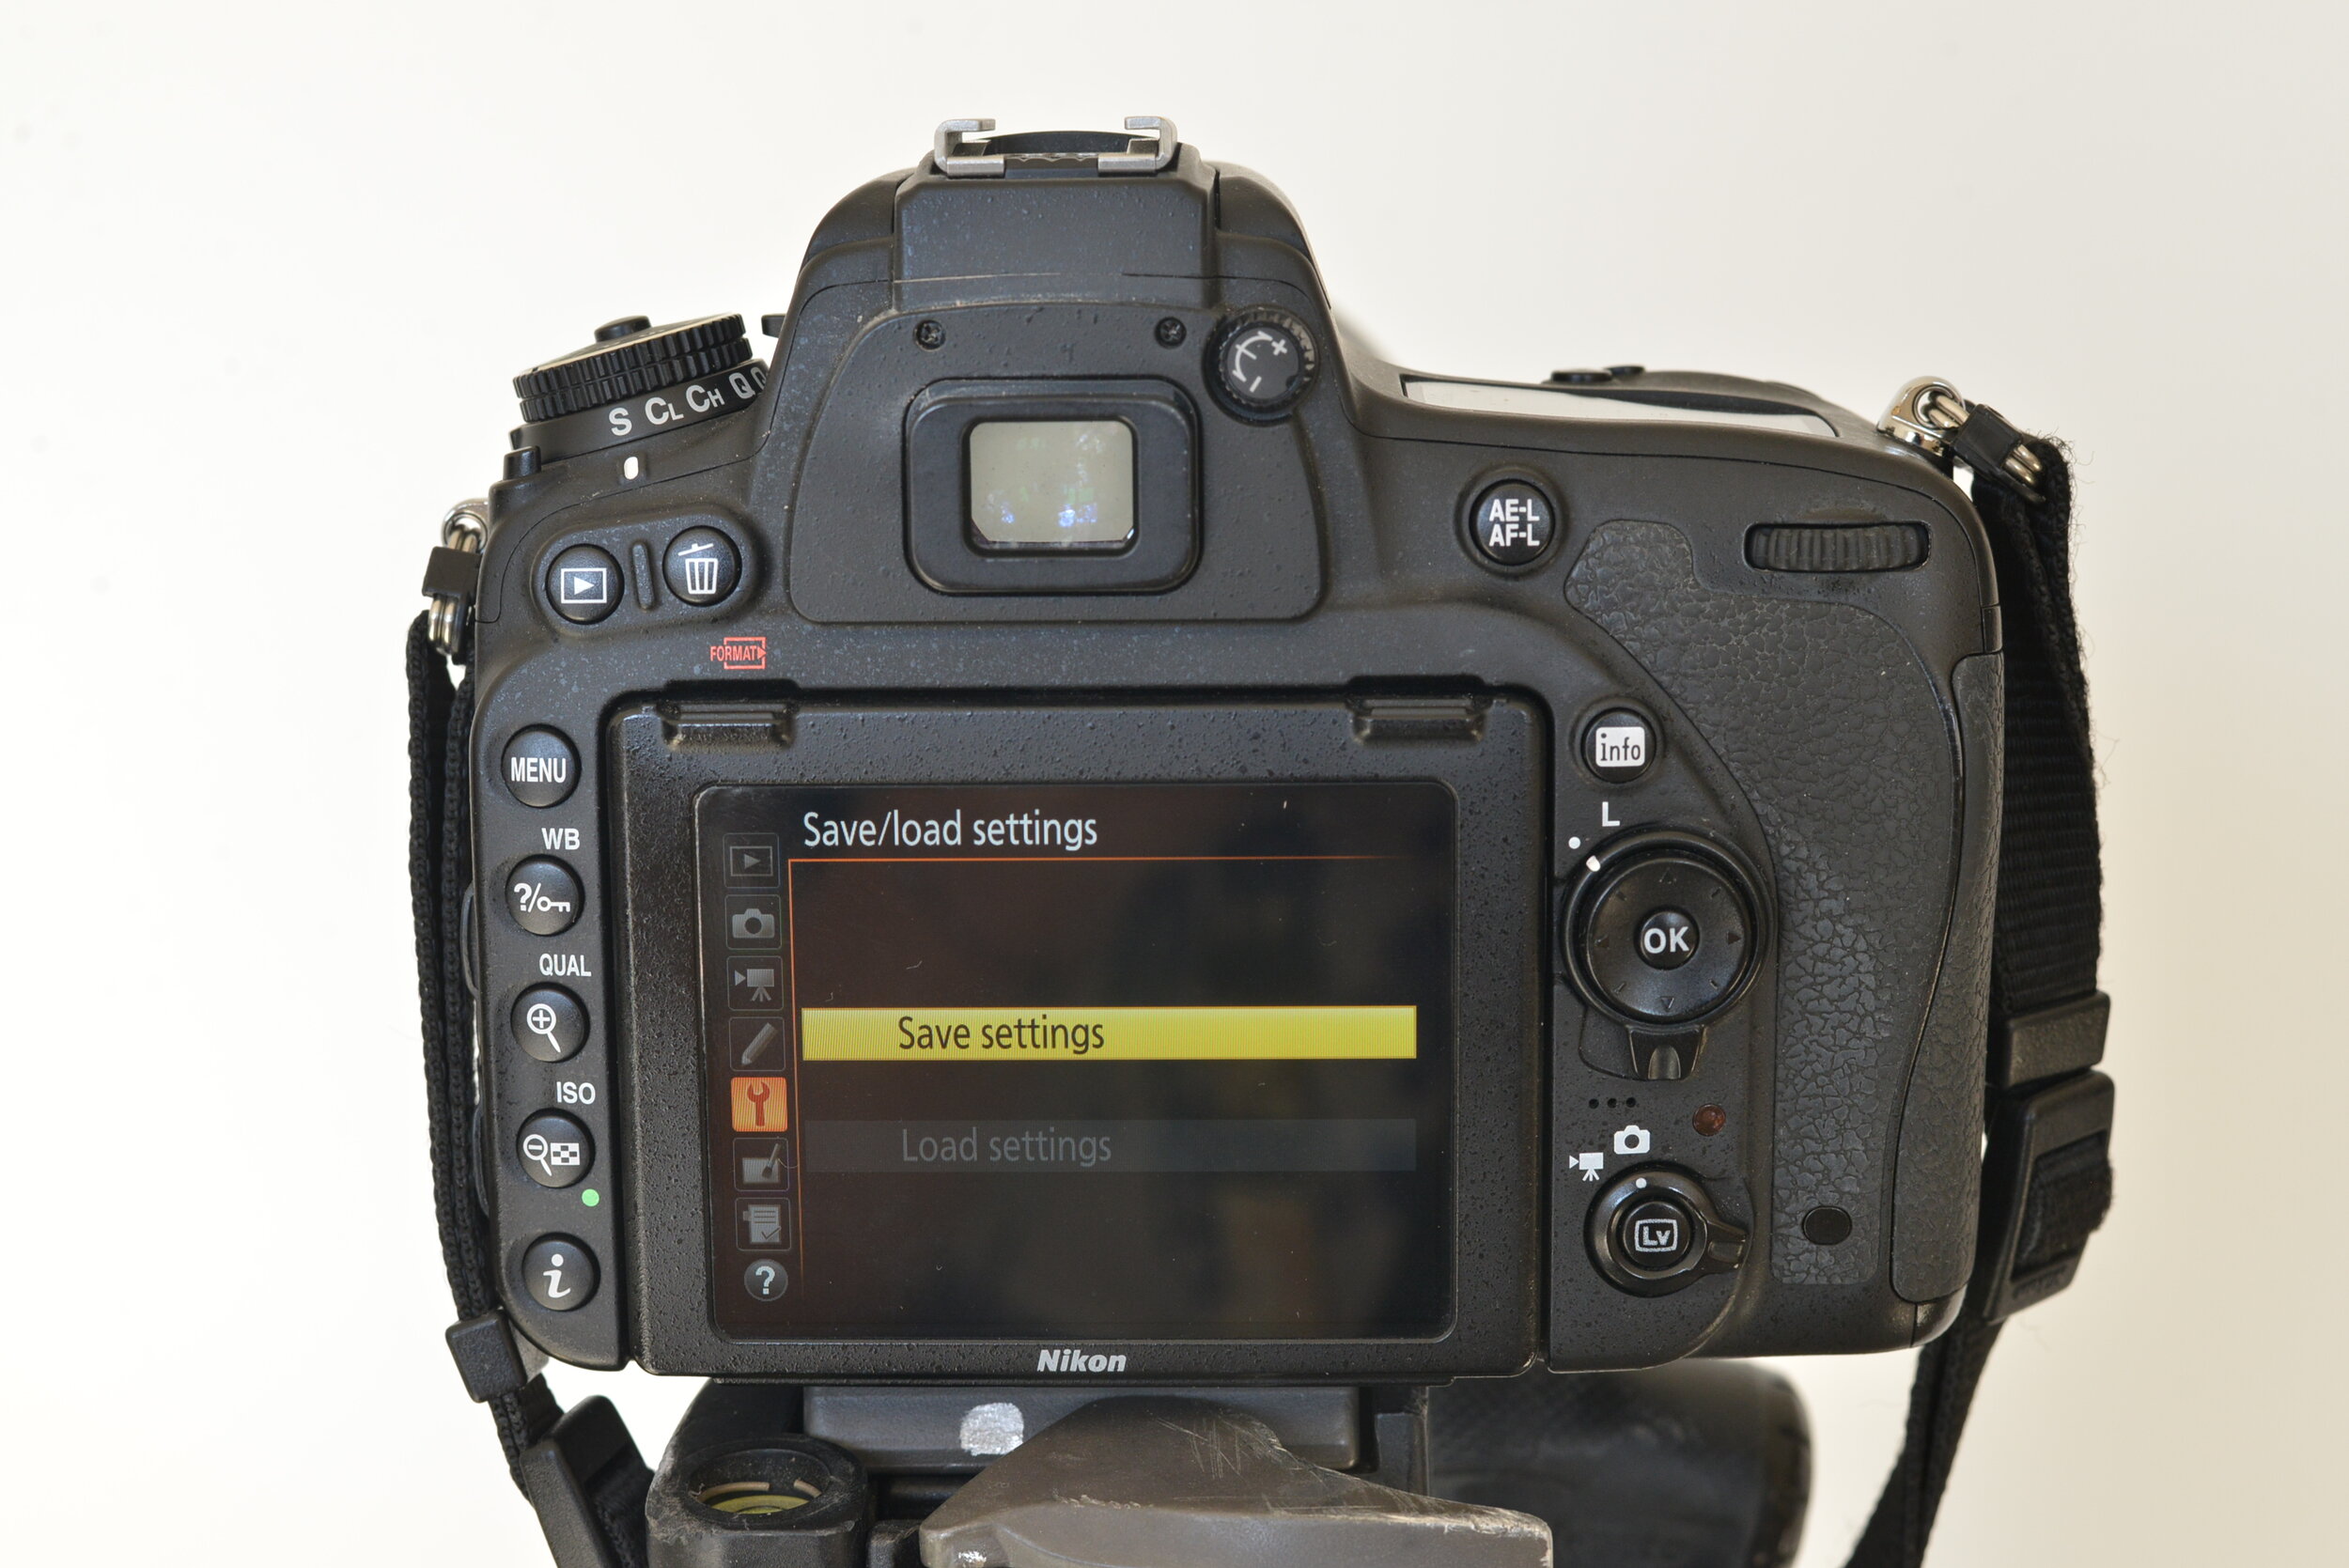
Save/Load Settings
Select ‘save settings’ to save all the current settings you are using in your camera to the memory card. You can also restore these saved settings by selecting ‘load settings’.

Virtual Horizon
Use this to check that your camera is level when placed on a surface or using a tripod.


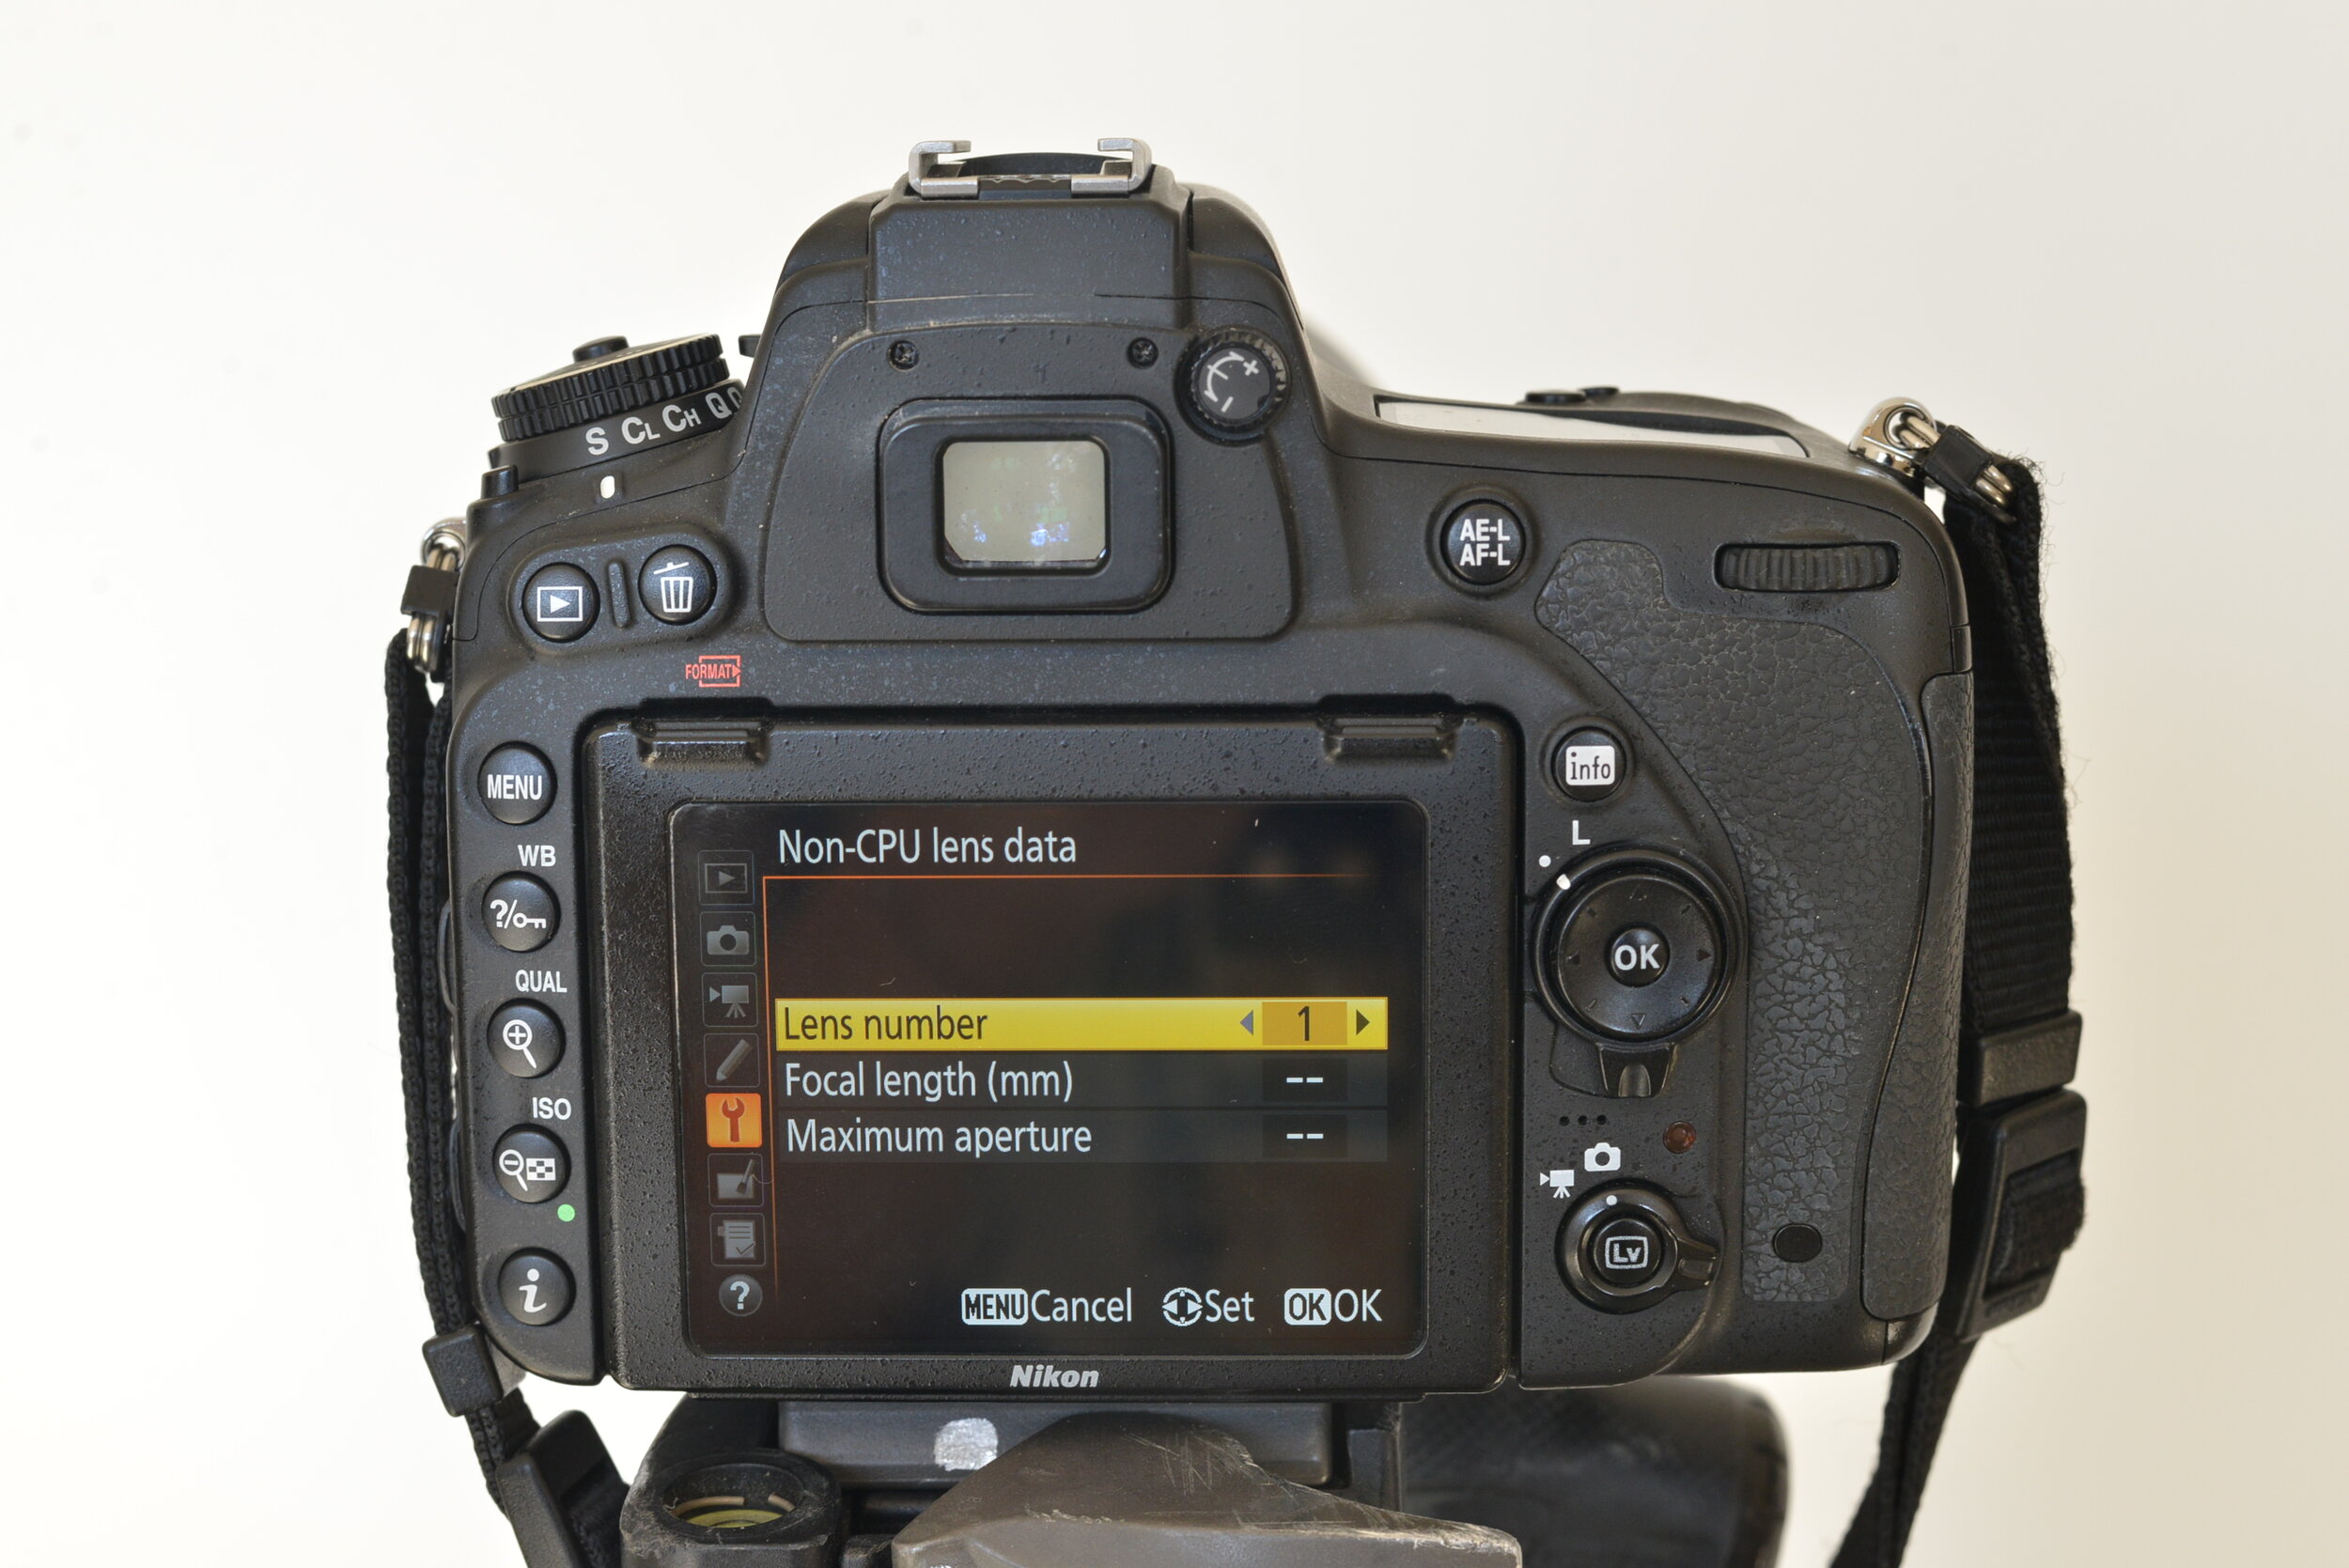
Non-CPU Lens Data
Here you can record the focal length and maximum aperture of non-CPU lenses, allowing them to be used with functions normally reserved for CPU lenses.

AF Fine-Tune
This is where you can fine-tune the auto focus on your lens (up to 20 lens types). It is advisable to carry out fine-tuning at a focus distance you frequently use, for example if you fine-tune at a short focus distance, it may be less effective at longer distances. The manual will not recommend using this menu as it may interfere with focus in normal conditions, but many photographers swear by it.


HDMI
This is where you can adjust any settings for any HDMI devices connected to your camera.


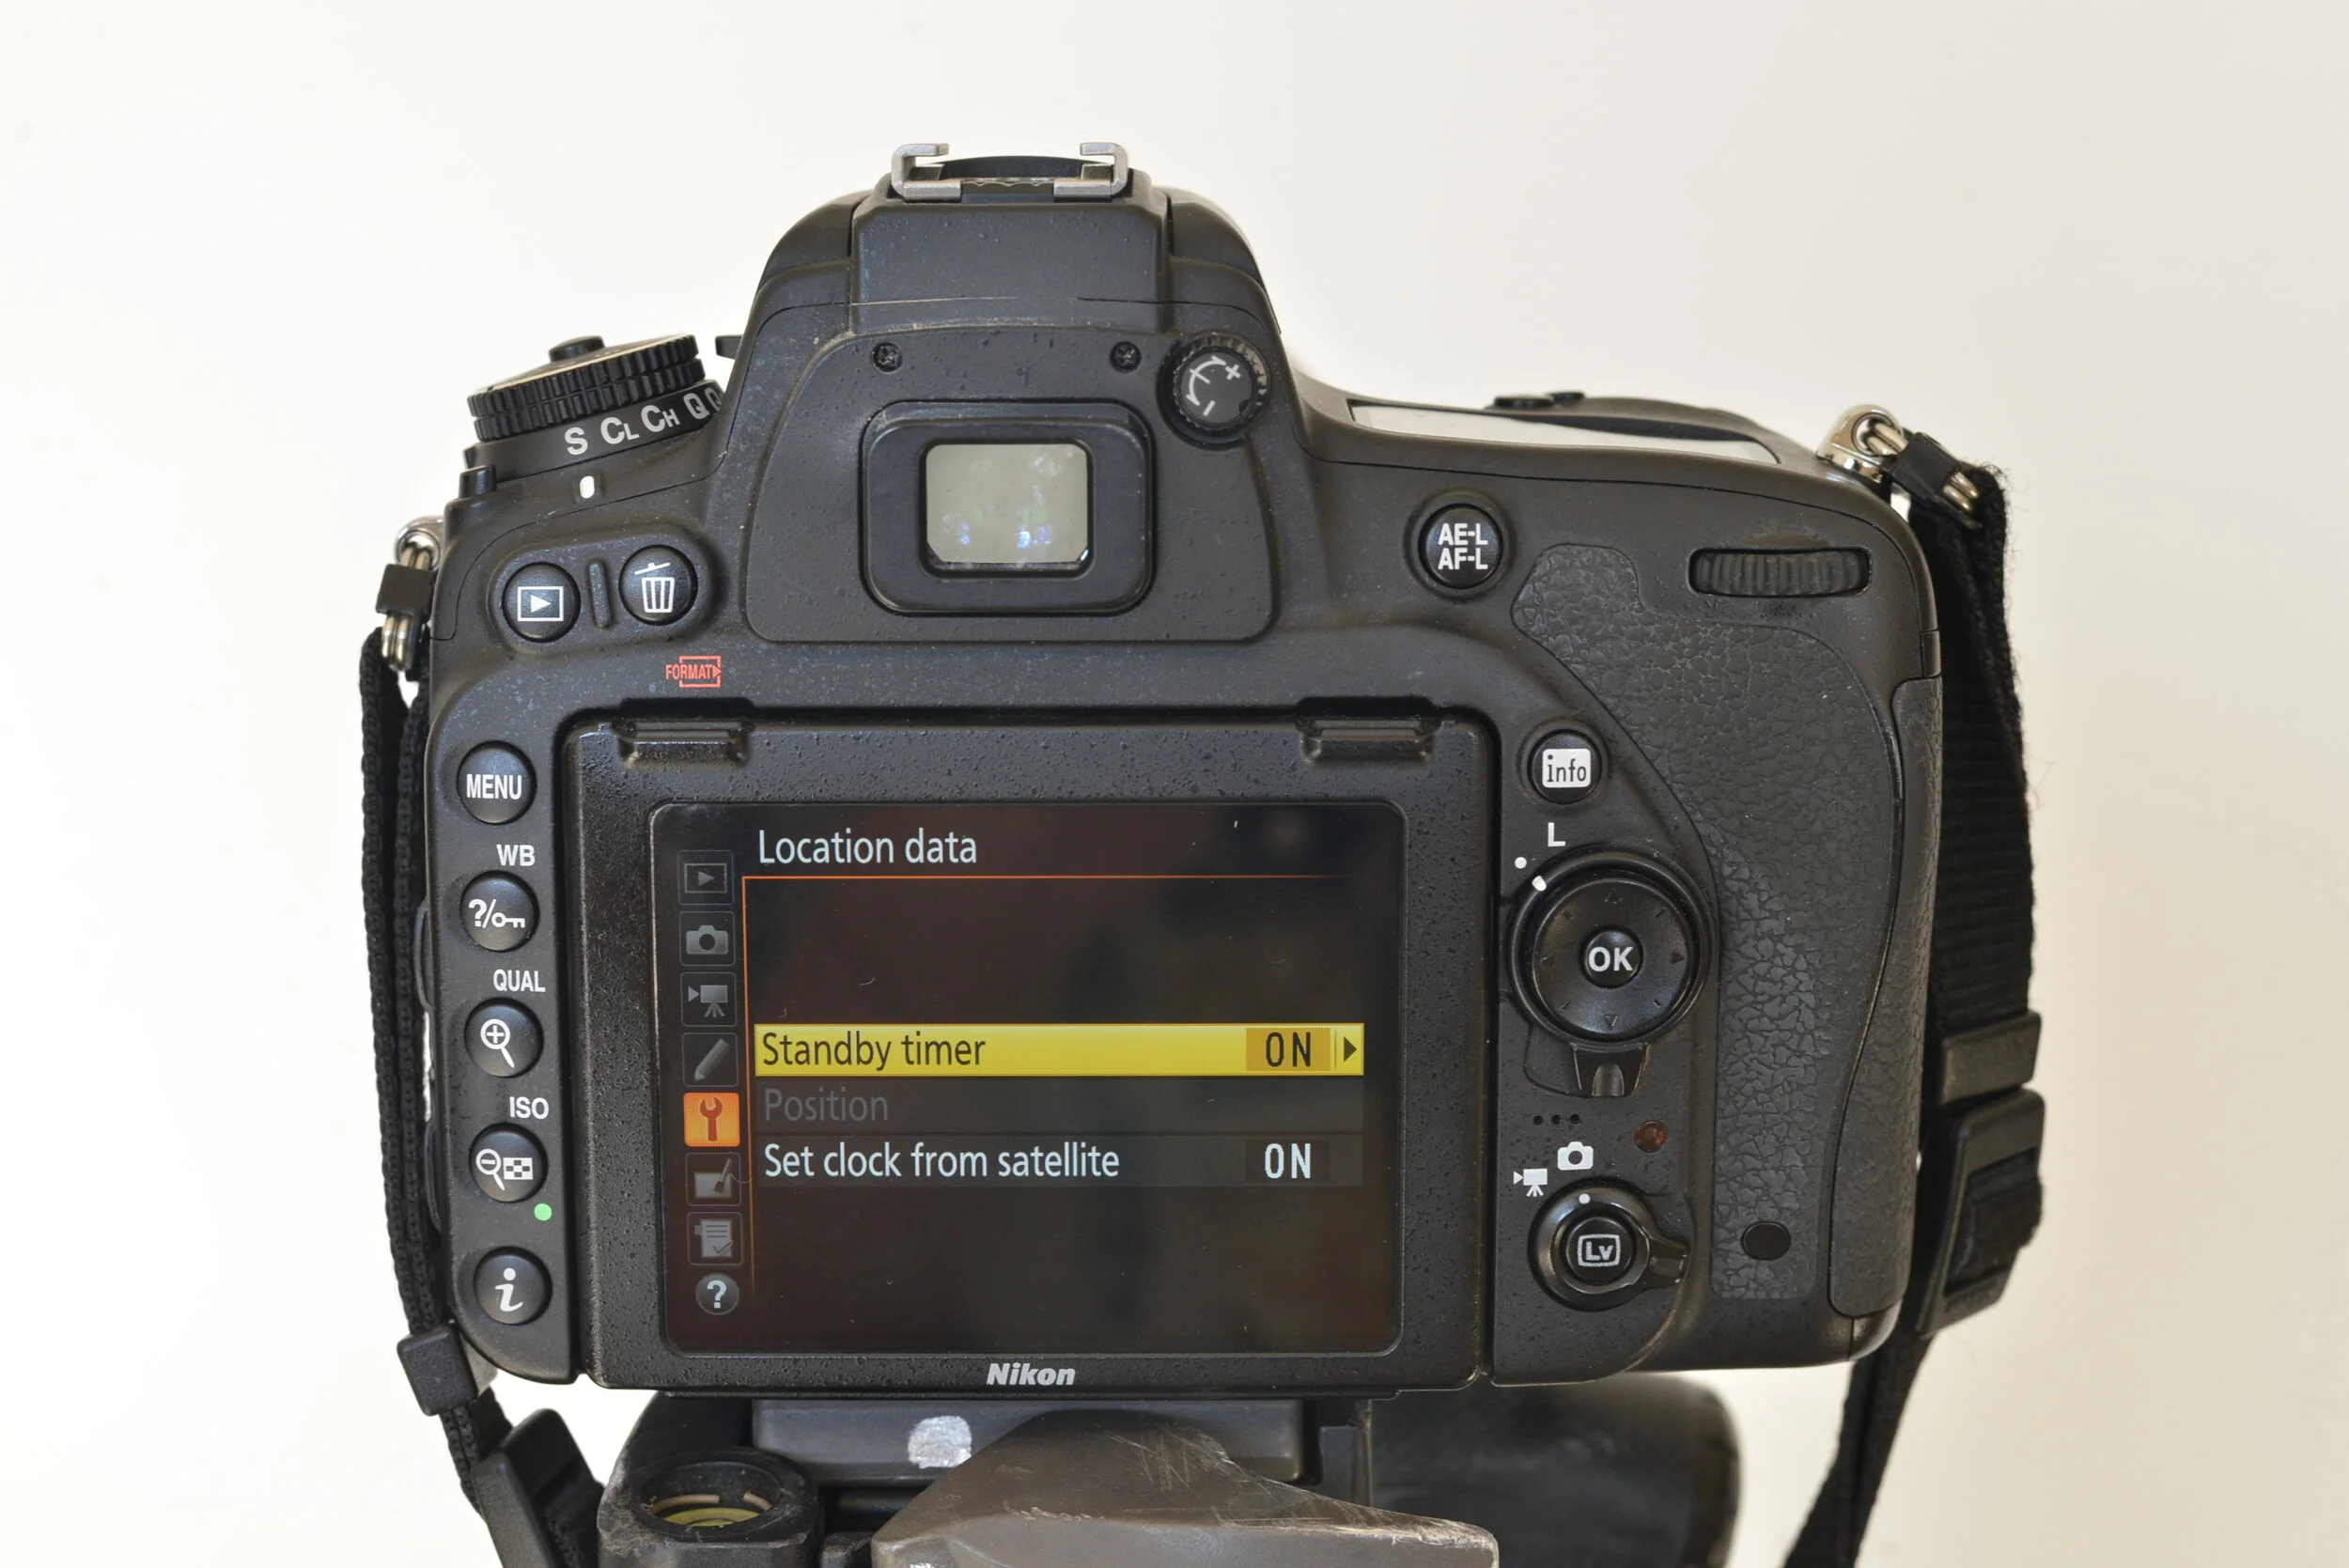
Location Data
You can download location data from a smart device or GPS connected to your camera (either via cable or wifi) and embed the data in pictures taken over the period of two hours.

WiFi
Here you can adjust the Wi-Fi (wireless LAN) settings, view your current settings and restore settings to default.


Conformity Marking
Here you can view the standards that the camera complies to.


Firmware
Here you can view the current camera firmware version.


Hopefully this was helpful for you and allowed you to understand your camera a bit better. If you want to learn more about in-camera menus, make sure to keep your eye out for Part Seven of ‘Every Setting On Your DSLR Explained’, where I will go through the retouch menu and what each option does. You can also read more about the Setup menu here in the online Nikon manual.
All images in this post are copyright (c) of Aby-Joanne Photography.