Tips and Tricks: How To DIY Your Own Maternity Shoot


It’s been a while since my last blog post; I’m sure from the title of this post you can work out why! Today I did my own maternity shoot, and share lots of tips and tricks on how you can do your own at home to.
I’m currently 30 weeks pregnant and it’s been a crazy journey so far. Unfortunately I haven't been able to work since December as I've been suffering from SPD rather severely (luckily I should be back to normal when the baby is born!) so it was great to finally be able to take some photos, even if I could only stand up for 20 minutes! But the fact that I can barely walk and still got some great photos in the space of 20 mins shows how easy it is for anyone to do at home, no professional equipment required! So feel free to watch my video, or carry on reading below for all my tips and tricks on how to do your own shoot.
MAKE UP AND HAIR TIPS
I always advise people go for a similar make up look to what they would usually wear, simply because you don’t want to look back at your photos and think ‘who is this person?’ You want to instantly see yourself of course! That being said, you should apply your make up a little bit heavier than usual. You’ll have noticed this if you’ve ever been married and had your make up professionally done. This is because natural light will of course brighten your face, which then creates a slight bleaching effect on-camera, so if you want your make up to show up really clearly you may need to go a little bit heavier than usual!
When it comes to your hair, I prefer a mix of up and down styles, to create some variety in your photos. You can of course use hair straighteners/curlers etc to create the desired effect, but what I did was a lot simpler. I simply left my hair damp after my morning shower, then put it up into a bun. I started by taking photos with my hair in the bun, then took it down half way through. Putting my hair up damp meant that when I took the hair band out, my hair had natural looking waves to it, which I think worked very well!

CLOTHING
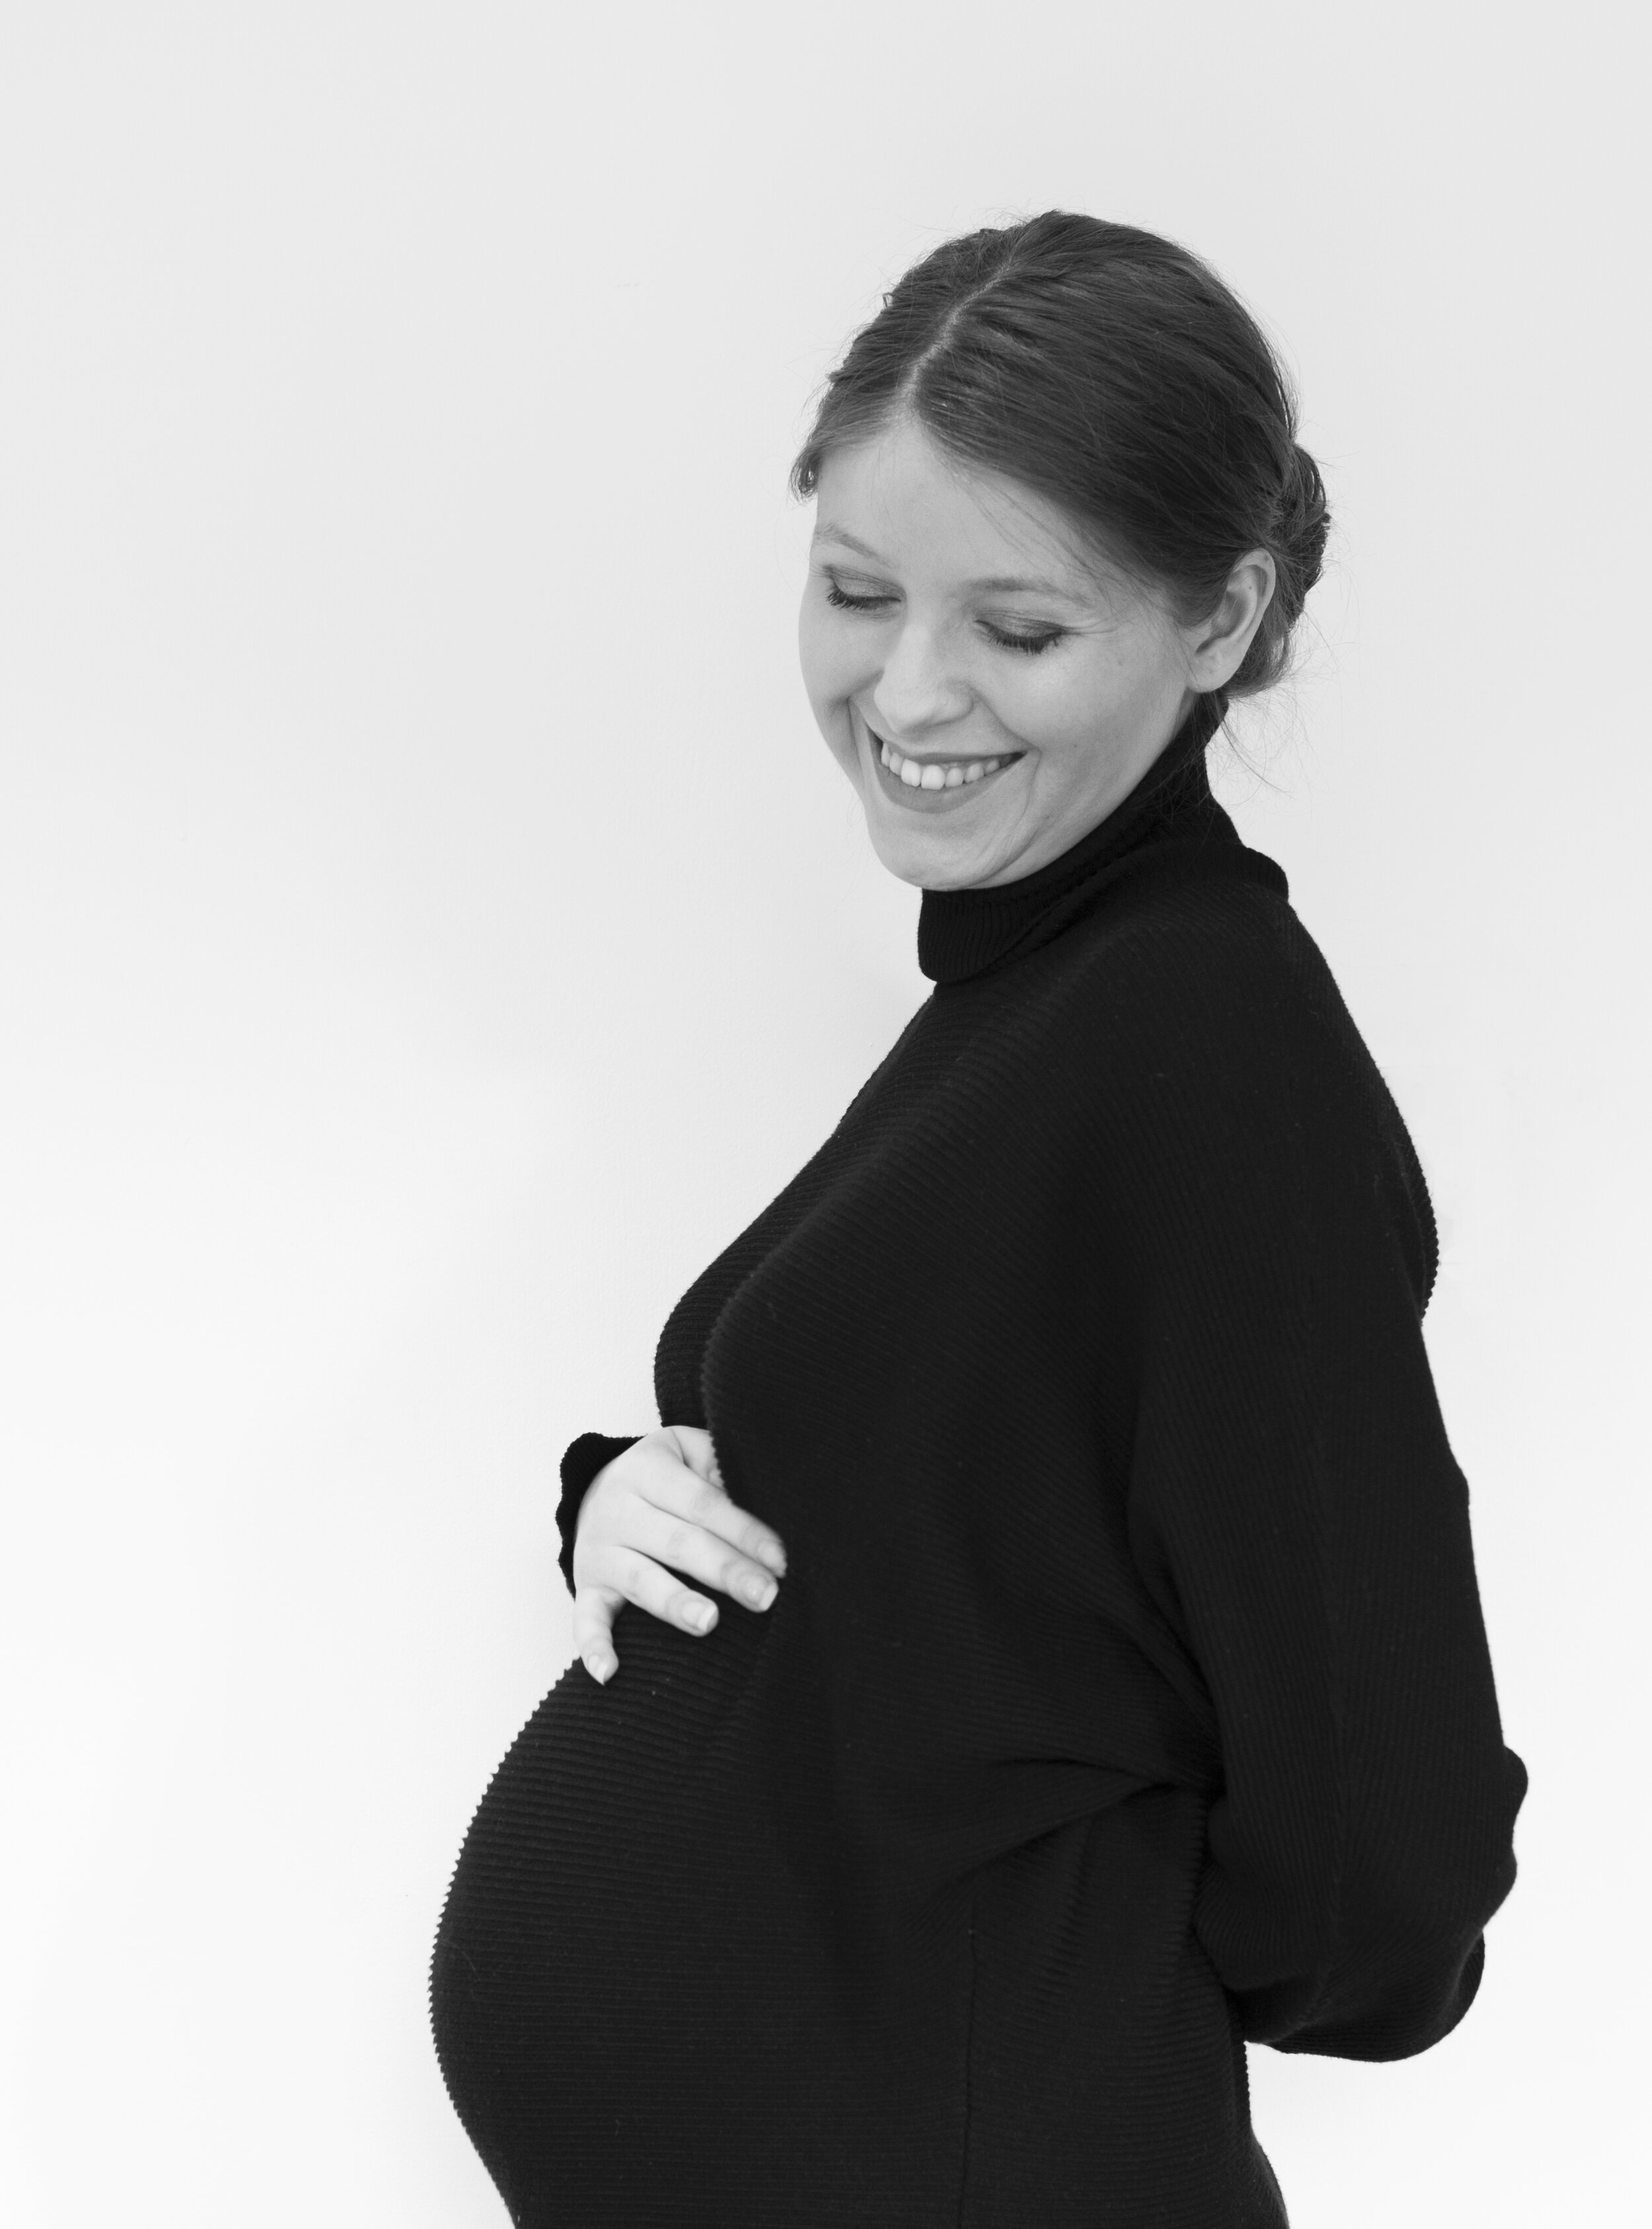
For clothing, you may have a particular dress in mind, or you might want to try a few different styles and outfits. I chose to do the latter and change dresses throughout to create a bit of variety. For maximum impact, go for contrasting colours and tones. For example, wearing black or a dark colour against a white wall will really help define your bump.
Likewise if you’re photographing outside, try wearing a colour that is the opposite to your background. For example, if your photographing in the woods or a field and there’s lot of green, a purple or pink dress would stand out the best as purple is opposite green on the colour wheel. This will help separate you from the background and create more definition on your bump.
Go for tight fitting clothes if you want to really define your bump, or go for more flowing fabrics if you want a more dramatic image.
CREATE A SIMPLE, CLASSIC SHOT USING A WHITE BACKGROUND
This is the most simple photo you can take but it’s very effective. Choose a blank wall in your house to stand in front of, and choose your outfit(s). If you are on your own you can use the self timer function on either a camera or a phone, or to make things easier, if you have a camera with wifi enabled, you can download an app on your phone which will allow you to connect to the camera and use your phone to focus and as a trigger for the shutter release. The app I use is called WMU. For these photos I used ISO 400, f4 and shot them at 1/60. If you have an iPhone 11 or later, you can put the camera into portrait mode and in the top right should be a little ‘f’. Select this and you can alter the aperture so the background becomes blurred. The lower the number (e.g f2) the more blurred the background will be, and the higher the number (e.g f16) the more everything will be in focus.
When posing, keep your shoulders straight by pushing out your chest. For a nice silhouette, when standing side-on to the camera, straighten one leg out in front of you. This will add more definition to your bump and create the desirable ‘s’ shape in your body. If you’re standing front-on to the camera, turn slightly so your not facing square into the camera and bend one of your knees inwards. This again will create an ‘s’ shape which is more flattering.


CREATE AN EASY SILHOUETTE SHOT
This is a very popular maternity shot and is surprisingly easy to create! All you need is a big door or window and a white sheet (I just used a bed sheet!). I created my shots by opening my patio door, hanging the sheet over it, then closing again to keep it in place. I posed in front of the door wearing a dress that was tight to my bump to create a good silhouette. For the camera settings I used ISO 200, 1/80th and f9. You want to use a higher aperture than before to ensure you appear dark, so for example f14 would be better than f5.6 in this situation. You can create a similar effect on a phone by adjusting the exposure, either whilst taking the photo or by editing the brightness and contrast after. The brighter it is outside the better the light will diffuse through the white sheet and the better your silhouette will be. For my photos I wanted a tiny bit of detail, but if you increase the contrast you can create a complete silhouette if you prefer!


MAKE SURE TO GET THOSE CLOSE UPS!
Remember to take some close up photos of your bump. These types of photos look particularly good desaturated or in total black and white. For these photos you want to return to using a lower f-stop (so f1.8 would be much better than f9 for example) to separate you from the background and create a lovely depth of field. For these photos I used 1/60th, ISO 400, and f2. This really brings out the detail and creates a beautiful light. Notice all of these photos I’ve taken so far have all been in natural lighting; it’s amazing what a difference it makes using the right manual settings on your camera or phone!


Hopefully those tips will help you create your own DIY maternity shoot, but if you have any questions please feel free to leave a comment below! I really urge every pregnant woman to get some photos like these to remember their pregnancy by. It goes by so quickly and it’s lovely to look back on them. Plus it’s a great way to make yourself feel good! Remember to tag me on Instagram (@abyjoannephotography) if you try any of these techniques, I love to see your artwork!
Happy shooting!
All images in this post are copyright (c) of Aby-Joanne Photography.